Installing wheels and tires
Installing wheels and tires can be tricky, but this guide will help you to install your wheel and tire package correctly so that you can have a safe and pleasant driving experience.
Pre-Installation
Set your Tire Positions. Match your tires beside its final position on your vehicle. This will help make sure that your tires are facing the right direction and helps to prevent mistakes.
You can look on the sidewall to find indicators for which way your tire should face.
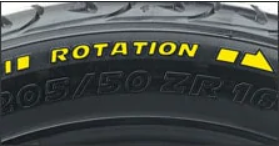
Directional Tires
Directional tires will have an indicator arrow on the sidewall showing which way the tire should be turning.

Asymmetric Tires
Asymmetric tires should have an indicator on the sidewall showing which side of the tire faces outwards.
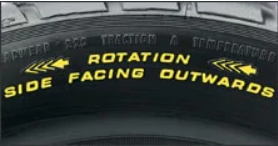
Directional & Asymmetric
There might also be indicators showing the side facing outwards and rotation that will help you determine which way your tire should be installed.
Note : If you are installing tires in pairs, it is a good idea to put the deeper treaded tires on the rear axle as it helps drivers to maintain control on wet roads much more easily.
Installation
Step 1: Remove your Wheel Hardware
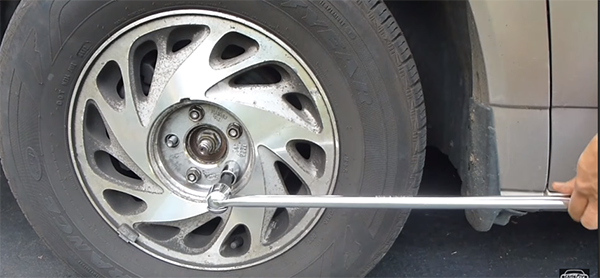
Remove your old wheels and tires by breaking the lug nuts or bolts loose. We recommend using hand tools as power tools such as power wrenches can damage the wheel hardware.
Step 2: Raise your Vehicle
Raise your vehicle with a jack and support your vehicle with jack stands. Remove your wheels and tires from your vehicle.
Step 3: Test Fit each Wheel
Test fit each wheel and check for the proper fit as described in the following steps.
Note: If you have only purchased wheels, it is important to test fit them before you install the tires.
Step 4: Check the Bolt Circle
Check to see if the bolt circle on your new wheel fits the wheel hub of your vehicle. It is EXTREMELY important that your wheel makes full contact with the wheel hub's surface and matches the bolt pattern. If your wheel does not fit, please contact us.
Step 5: Verify your Lug Nuts or Bolts
With the wheel removed, install the lug nuts or bolts to make sure that you have the correct sizes. Do not force the hardware onto the wheel hub. If you feel any resistance during the installation, check for any obstructions and try another. If it still does not match and you experience resistance. Feel free to give us a call and we can check if you have the correct hardware.
Note: Do not force your lugs on with a wrench. They should be able to be turned by hand! If they can't something is wrong. Only after they are installed by hand should you tighten them with a four-way wrench.
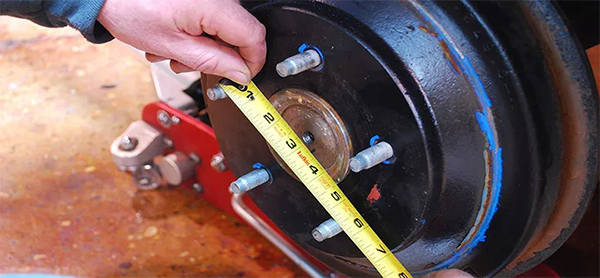
Step 6: Verify Brake Clearance
You need to verify that your new wheel and tire fitment is compatible with your brake system. So, temporarily install the wheels and tighten the lugs or bolts to see if there is enough space between your calipers and wheel. You should have at least 3-4 millimetres of clearance between your wheels and calipers (The caliper in the picture is the red piece).
Step 7: Verify Calipers

With your vehicle still raised, put the transmission into neutral and turn each wheel by hand to see if any of the brakes come into contact with the wheel or wheel weights. If there is contact, your wheel is improperly sized.
Step 8: Install the Wheels
Install each of the wheels by tightening the lugs or bolts using a crisscross sequence. Proper installation requires that your wheel lug torque is set to the recommended specification found in your vehicle owner's manual. Finish tightening the lugs or bolts with a torque wrench and be careful not to over-torque your wheel as you can strip your lug nut or distort your wheel.
Step 9: Re-torque your Wheels
As the wheels break in on your vehicle, they may compress and loosen your hardware. So, it is important to re-torque your lugs or bolts after driving around 75-150 kilometres. Simply repeat the torque instructions above.